Creating Users
- Log into the Mursion Portal
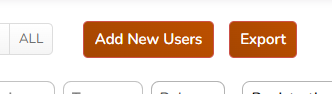
- Click the Users tab at the top of the screen

- Click Add New Users
- If you are adding more than 500 users, you should use the Import Users feature in the next section.
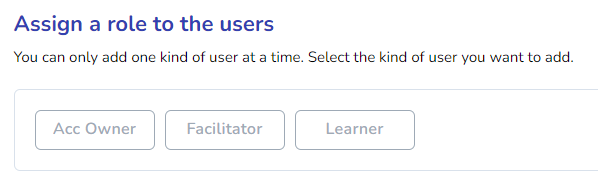
- Select the type of user you are adding. Learn more about user roles here.
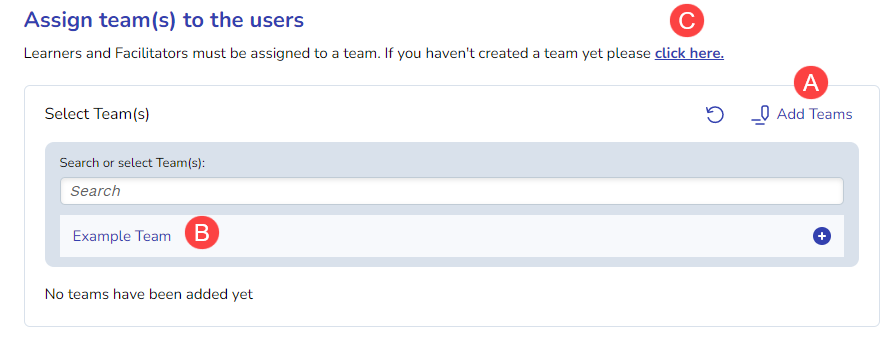
- Each user must be assigned to a Team.
- Click the Add Teams button to display the available teams
- then select from the list
- If you have not yet created a team, click the reminder and follow the team creation process.
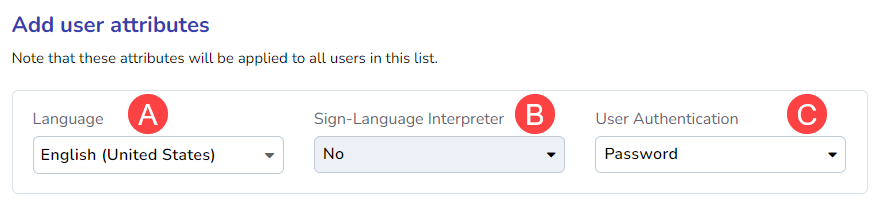
- Select the appropriate user attributes for all the users you're adding
- Language: Set the learner's language
- Sign-Language Interpreter: Select yes if this list of learners will all require a Sign-Language Interpreter
- User Authentication: Will these users be authenticating via Username and Password, or are they authenticating via SSO
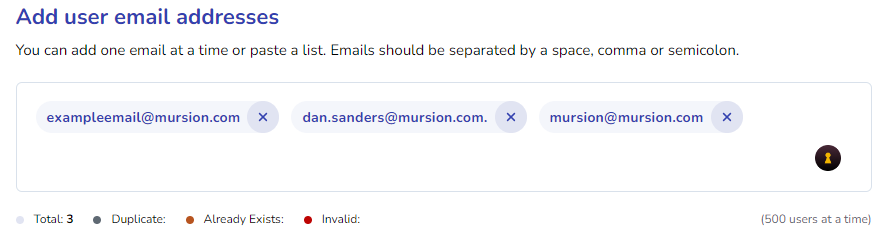
- You can add one email at a time or paste a list. A space, comma, or semicolon should separate emails. Press enter to confirm each selection.
- Once you've added all your users, click Proceed
- The system will scan your list and will alert you if there are duplicate emails, emails that already exist in the system, or if any email is invalid
In this example, one email is invalid (has a period at the end of the address), and one is a duplicate.
Resolve these issues by fixing the typos or removing the duplicate emails, and click Proceed to add your list of users.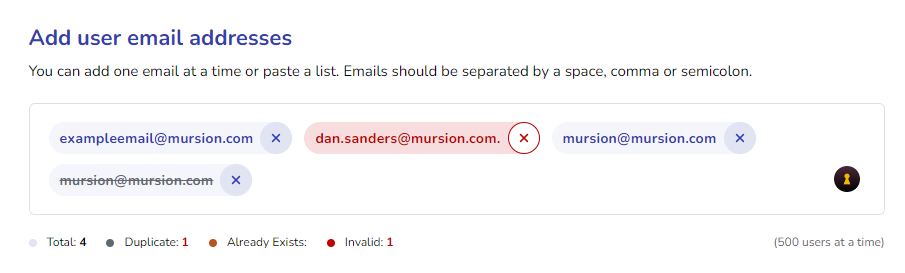
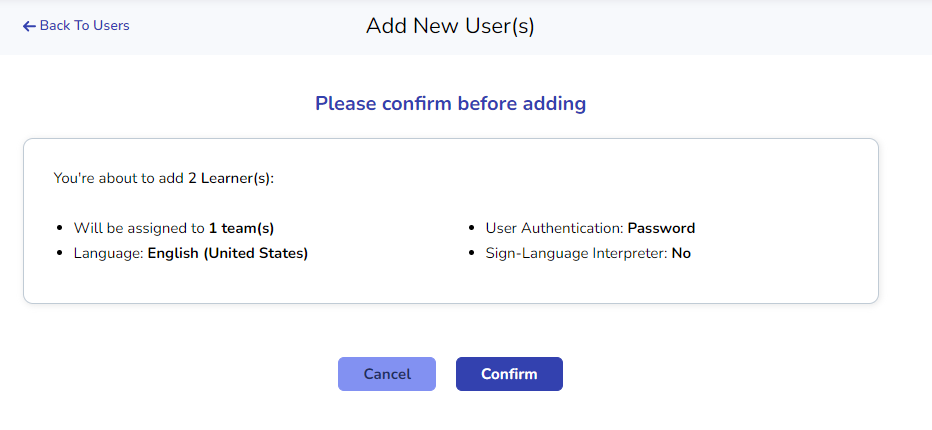
- Once your list is free of errors, clicking Proceed will take you to a Confirmation screen that will display how many learners you're adding and which attributes will be assigned. Review and click Cancel to start over or Confirm to proceed.
Note: Clicking Confirm will send an email invitation to any users authenticating via password to complete the registration process.
Import Users
You should use the import function if you add more than 500 users at once. It's the most time-efficient.
- Log into the Mursion Portal
- Click the Users tab at the top of the screen

- Click Import Users (if you use an SSO, this button will say Import External Users)

- You will see this list of instructions:
Step 1 of 4 - Instructions:
-
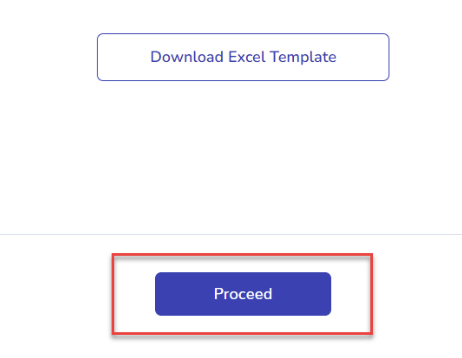
Click Download Excel Template below and open and open the downloaded file (either client_internal_users.xlsx or client_external_users.xlsx)
-
In the template, the email and role fields are required – Do not leave these blank. Add the user information correctly under each header. DO NOT change the headers, template structure or filename as this could result in a failed import
-
In Column L through S add the names of any Teams the user should be assigned to (make sure your spelling matches the name exactly)
-
Once you enter all your users, save the file to your desktop or somewhere you’ll remember and click Proceed
-
If there are any errors in your file, they will be shown in a resulting spreadsheet in Step 4. Follow the instructions to correct the errors in the original template and re-upload the file
-
If you choose to continue without fixing the errors, the Download Failed Upload List file will be available for 7 days only.
-
- When you're ready, click Download Excel Template
- Open the Excel Template you downloaded (either client_internal_users.xlsx or client_external_users.xlsx)
Using the Excel template
- Open the Excel template, the first row indicates what data should be entered in each column. If you are using an SSO to access Mursion, the template will be slightly different - the SSO ID is required in the event you are using SSO.
- SSO User Import

- Non-SSO User Import

- SSO User Import
- Check your spelling! Spelling errors, misplaced @ symbols, and other minor typos can lead to an error report.
- You'll also want to double-check the exact team names if assigning learners to a team.
- Once your data is entered, save your file to your desktop or somewhere you'll remember.
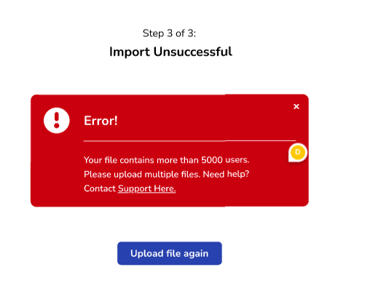
Note: The upload feature has a 5000-user max limit. If you need to upload more than 5000 users, you'll need to create multiple templates in batches of 5000.
Save and Upload your File
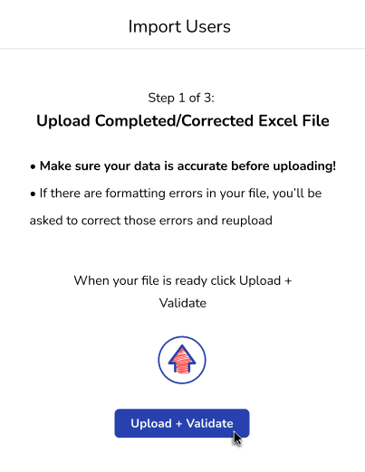
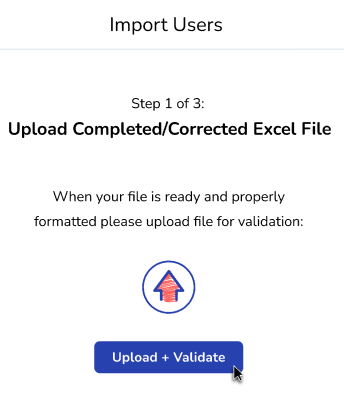
- Once you've saved your file, return to the portal and click Proceed.
- Review the instructions, then click Upload + Validate
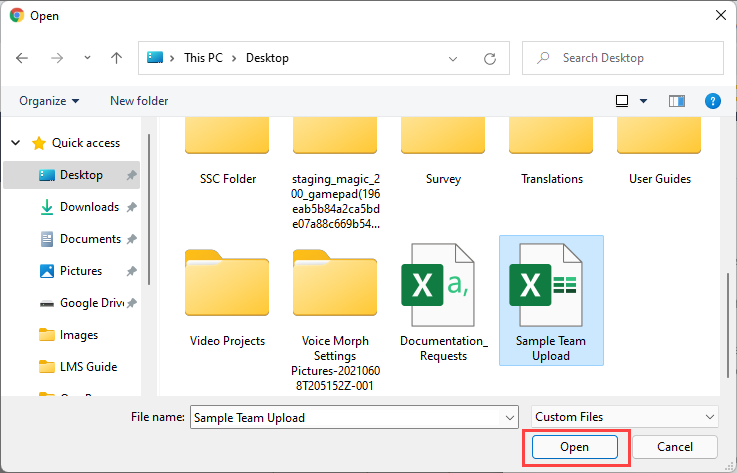
- In the browser, navigate to the file you created, select it and click Open
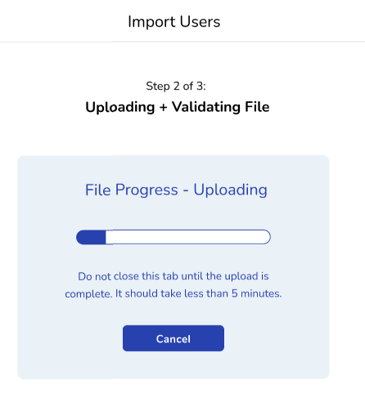
- The portal will scan your file and upload it accordingly. It may take a few minutes.
- If everything goes smoothly, you'll get a success message

- If you exceed the limit, you'll get a max limit error
- If there are errors in your file, you'll get a message telling you how many users were successfully uploaded and how many users were not.
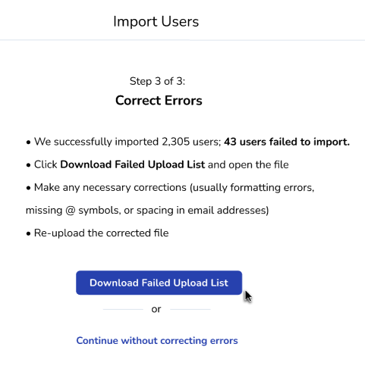
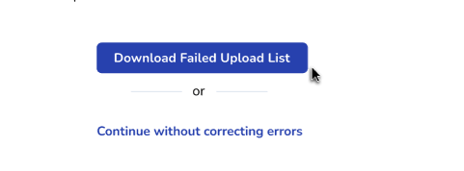
- To resolve the errors, click Download Failed Upload List
-
In the new file, there's a new column A, which gives an indication of the error that needs to be resolved. Find the error in your entries, resolve them as best you can and save the file to your desktop or somewhere you'll remember.
- And click Upload + Validate
- This will repeat the validation process, continue until you have uploaded all your users, or click continue with correcting errors to continue without resolving.
Final Steps
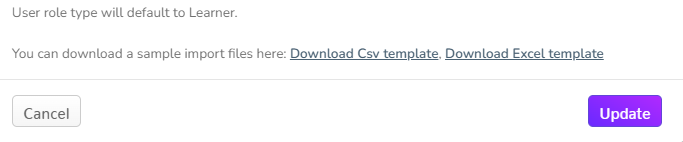
- Once you've confirmed the roles and made any changes you'd like to make, click Update
- You'll see a progress indicator while the system uploads your new users:

- If there are any errors, they'll be flagged with a red warning icon, and you'll be able to hover over the warning icon and the red X to learn more about why the error happened. In this case, it's because this learner was already uploaded to this client:

- In this case, you can delete the learner and try again.
- Once all errors are removed, the list will upload, and you'll see your new learners in the user's tab and their respective teams. If you need to reassign learners to new teams, see this article.